
A traditional swag valance does not always need elaborate details or contrasting fabrics to make an impact. Sometimes, the shape, proportions, and natural drape of the fabric are enough.
For this design study, we explored a combination of three swags and a pair of cascades for a child’s bedroom. The goal was to keep the look traditional but simple, with a single fabric color and no additional decorative trims.
This article follows the process from the initial design and fabric cutting to the finished board-mounted valance, including a closer look at the construction details along the way.
1. Starting with the Room and the Design Idea
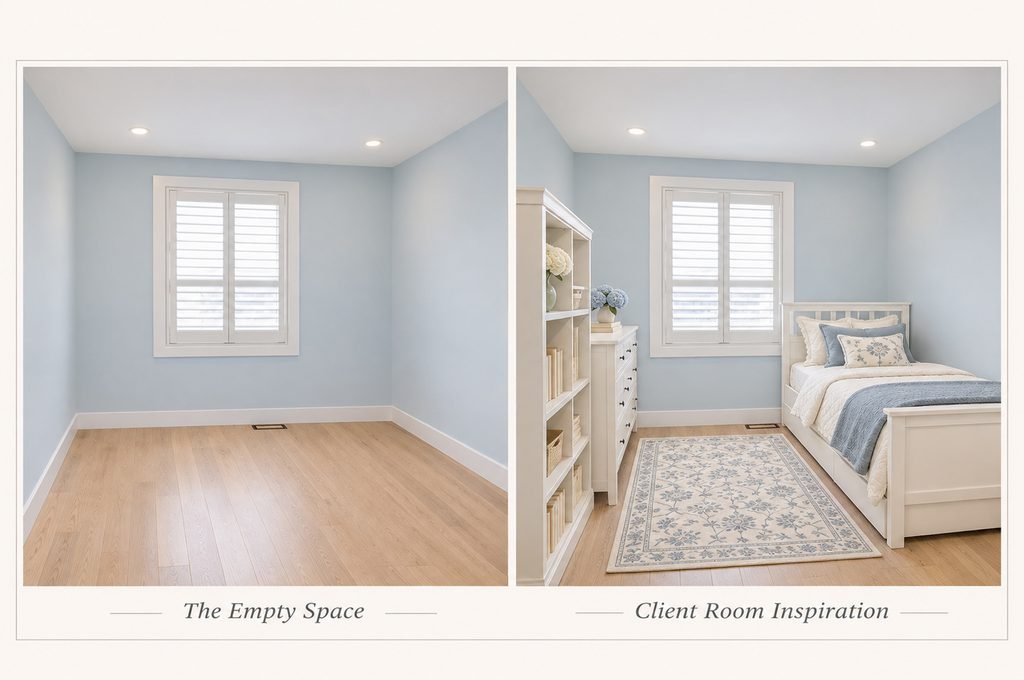
The starting point was a child’s bedroom with existing white plantation shutters.
The idea was to add a decorative valance above the shutters, bringing a softer, more traditional look to the window without making the room feel overly formal.
The design brief was quite straightforward:
- A traditional combination of swags and cascades.
- A simple shape without extra trims or elaborate decoration.
- One fabric color throughout, with no contrasting panels.
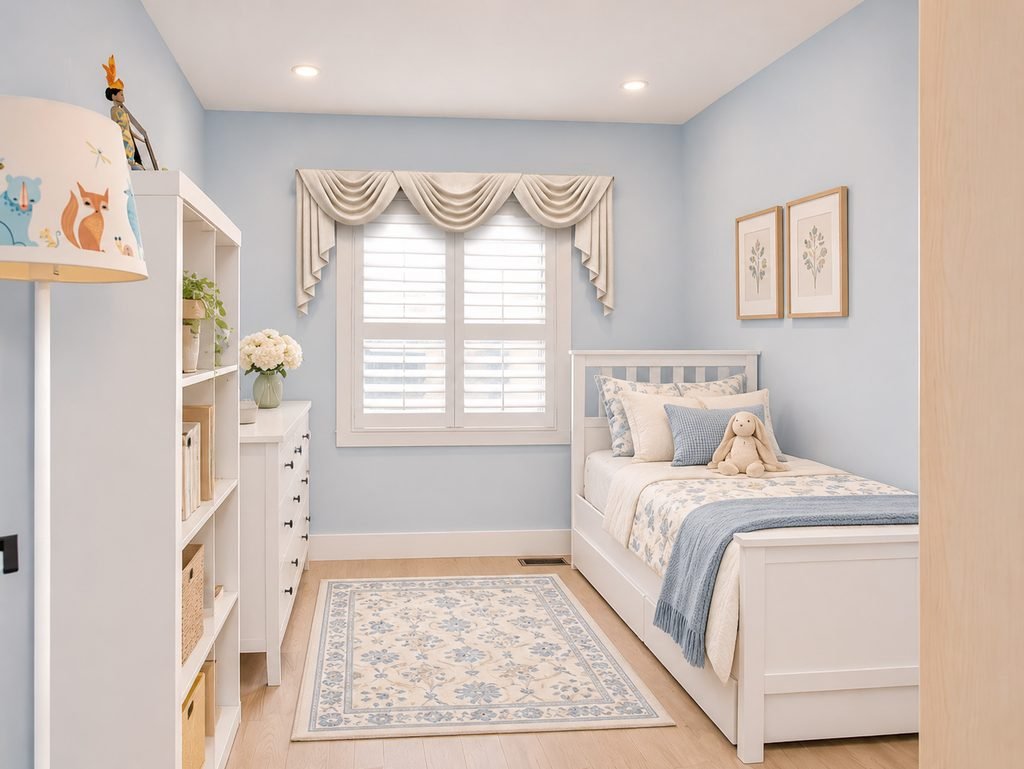
- A look that would sit comfortably with the soft blue walls, white furniture, and warm wood tones in the room.
We settled on three swags across the top, with a cascade on each side. The center swag would be slightly wider than the two side swags, giving the design a gentle sense of balance and movement.
2. Choosing the Style and Fabric
Three Swags and a Pair of Cascades
The design consists of three individual swags and two side cascades.
The center swag is the main feature, while the two smaller side swags create a gradual transition toward the cascades. Together, they form a continuous decorative treatment across the window.
Rather than making every section identical, we adjusted the widths and drop of each swag to create a more natural arrangement.
A Soft, Single-Color Palette
Warm ivory was chosen for the entire treatment.
The textured fabric adds subtle visual interest without introducing another color. It also works well with the white shutters and the softer blue and beige tones in the bedroom.
Using the same fabric throughout keeps the design calm and cohesive. One trade-off, however, is that the cascades have less color contrast and therefore a softer visual definition.
For another project, a contrasting reverse fabric in soft blue or white could be considered to highlight the folded edges of the cascades. For this design, we kept the original single-color approach.

3. Working Out the Proportions
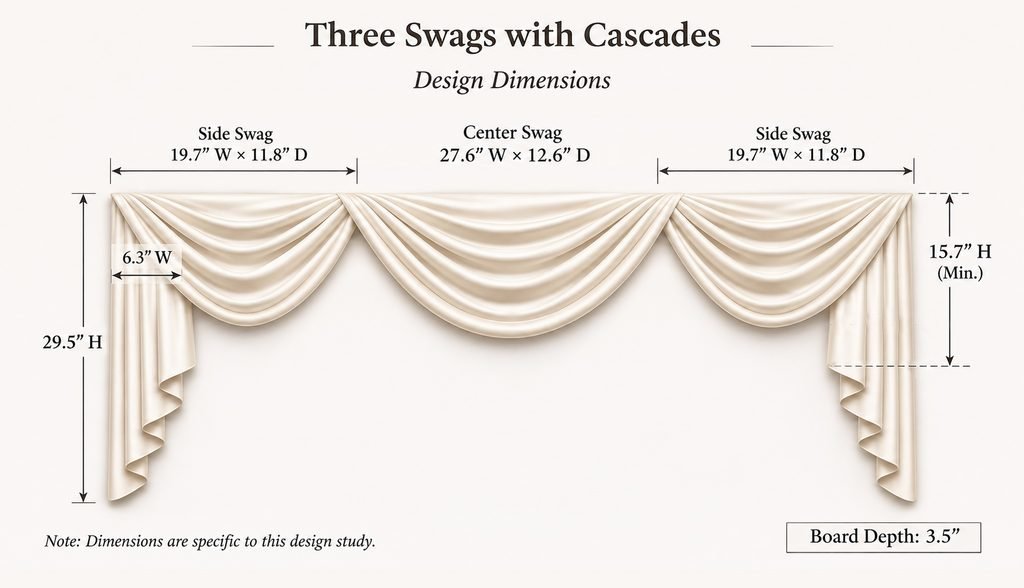
Before cutting the fabric, we worked out the overall dimensions and the proportions of each section.
The finished treatment is approximately 63 inches wide, designed for a window measuring around 47 inches wide.
The center swag is wider than the two side swags, while the cascades extend down at both ends to complete the shape.
These dimensions were developed for this particular design rather than taken from a standard swag formula.
The depth of each swag, the overlap between neighboring sections, and the amount of fabric needed for the folds all influence the final appearance. A dimension drawing helps establish the basic layout before moving on to the fabric.
4. Drawing the Cutting Patterns
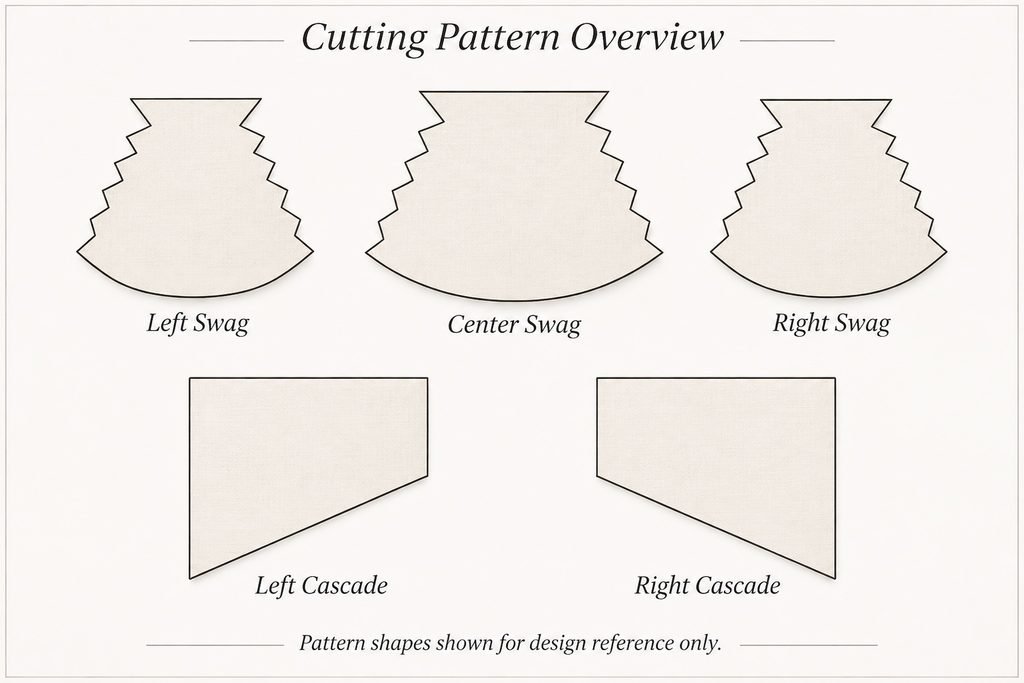
Once the proportions were established, we moved on to the cutting patterns.
The shapes were first drawn on paper, then transferred to the fabric as cutting guides. Each swag was cut directly to its planned outline, with separate patterns for the center and side sections.
The two cascades were also laid out as corresponding left and right shapes.
Getting the cutting outline right at this stage is important because it determines the basic shape of the finished swag before the folds are arranged.
5. Cutting and Forming the Swags
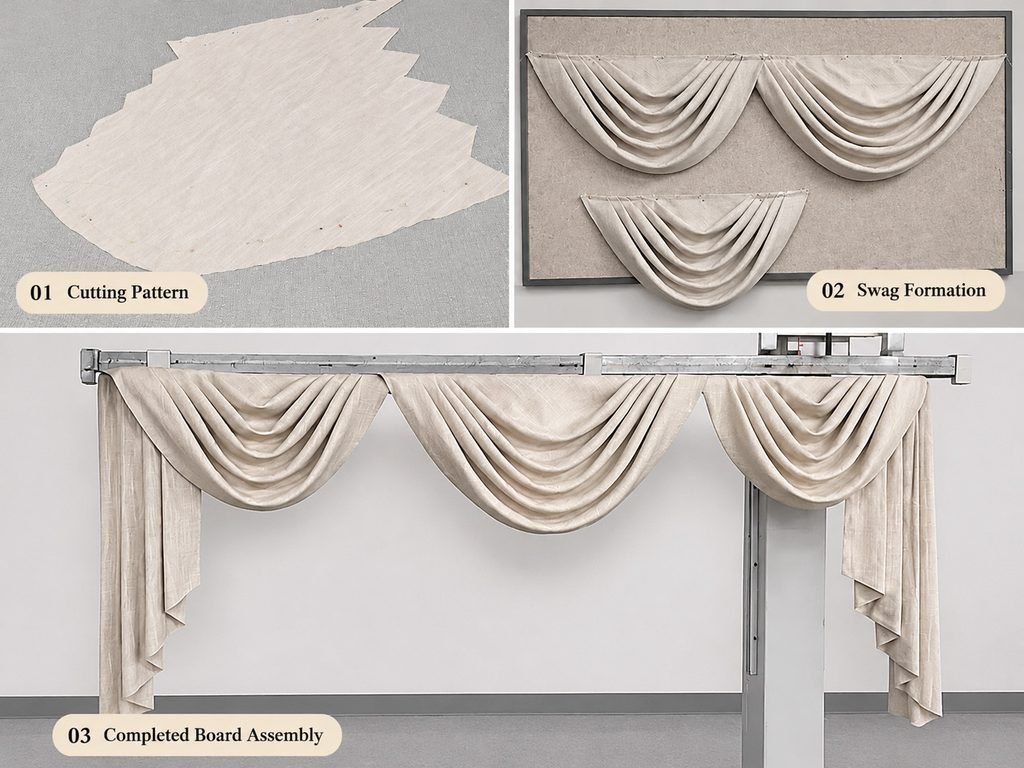
With the patterns ready, the fabric was cut and prepared for shaping.
The three swags were then arranged and secured individually, with attention to the distribution of the folds and the curve of each section.
A few things are worth watching during this stage:
- Whether the folds are evenly distributed.
- Whether each swag hangs in a natural curve.
- Whether the center and side sections work together proportionally.
- Whether the overlapping areas between swags look balanced.
The three sections need to read as one continuous treatment, even though each is shaped and adjusted separately.
6. The Wrapped Board and Corner Details
A Fabric-Wrapped Board
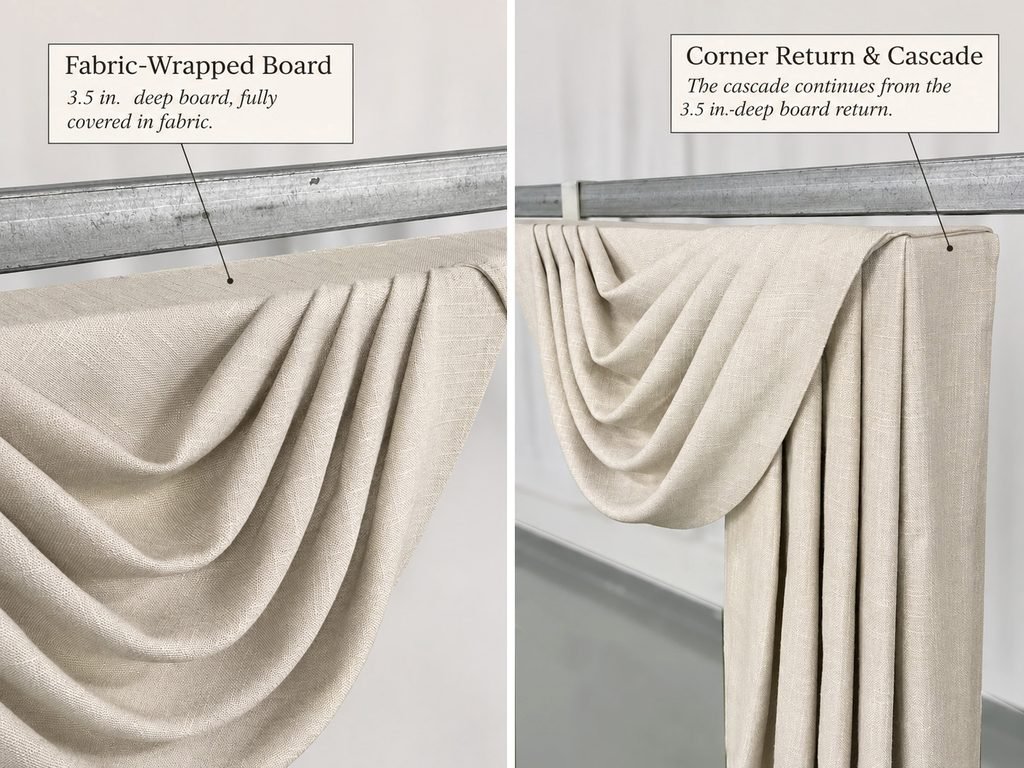
The valance is mounted on a wooden board approximately 3½ inches deep.
The board is fully covered with the same fabric used for the treatment, giving the top edge a neat, consistent finish.
The board depth also provides the space needed for the side returns and the cascade attachment.
Corner Return and Cascade
One detail worth looking at more closely is how the cascade turns around the side of the board.
Rather than stopping at the front edge, the fabric continues around the 3½-inch board return before falling down at the side.
This means the corner needs to be considered as part of the overall construction, not just as a finishing detail. The fabric coverage and the transition from the front to the side should look neat and continuous.
7. Putting Everything Together
After the swags and cascades were prepared, they were secured to the wrapped board and placed on the display frame for a final check.
Looking at the complete assembly makes it easier to assess the relationship between the individual sections.
We checked the overall proportions, the shape of the folds, the balance between the two cascades, and the way the fabric wrapped around the board returns.
The finished piece keeps the traditional character of a swag-and-cascade valance while following a simpler design direction. The focus stays on the fabric, the folds, and the shape rather than additional decoration.
A Note from the Workroom
Working through this design was a useful opportunity to explore the proportions and construction of a three-swag valance with side cascades.
There is always more than one way to approach a window treatment, and each project brings its own details to work through.
We will continue sharing more of our design and making projects, along with the everyday observations and experiences gathered along the way.