
At first glance, the two vertical edges of a drapery panel may seem like simple finishing details. Once we begin looking more closely at custom drapery, however, those edges reveal quite a few differences in construction, hardware, closure, and design.
The outside edge may finish quietly at the side hem, be supported by an additional ring, or continue back toward the wall as a return. The leading edge may be independently pinned, left without a separate edge attachment, used as part of the center closure, or treated as an important decorative feature.
There is no single approach shared by every workroom or hardware system. In this article, I am not trying to establish one standard. Instead, I have gathered several common examples to look at how these two edges are handled and how those choices affect the finished drapery.
For clarity, I will use side edge to describe the outside edge of the panel, and leading edge for the edge that faces the opening or meets the opposite panel when the drapery is closed.
The Side Edge
The side edge is the outside finishing edge of a drapery panel. Depending on the hardware and the intended appearance, it can be handled in several different ways.
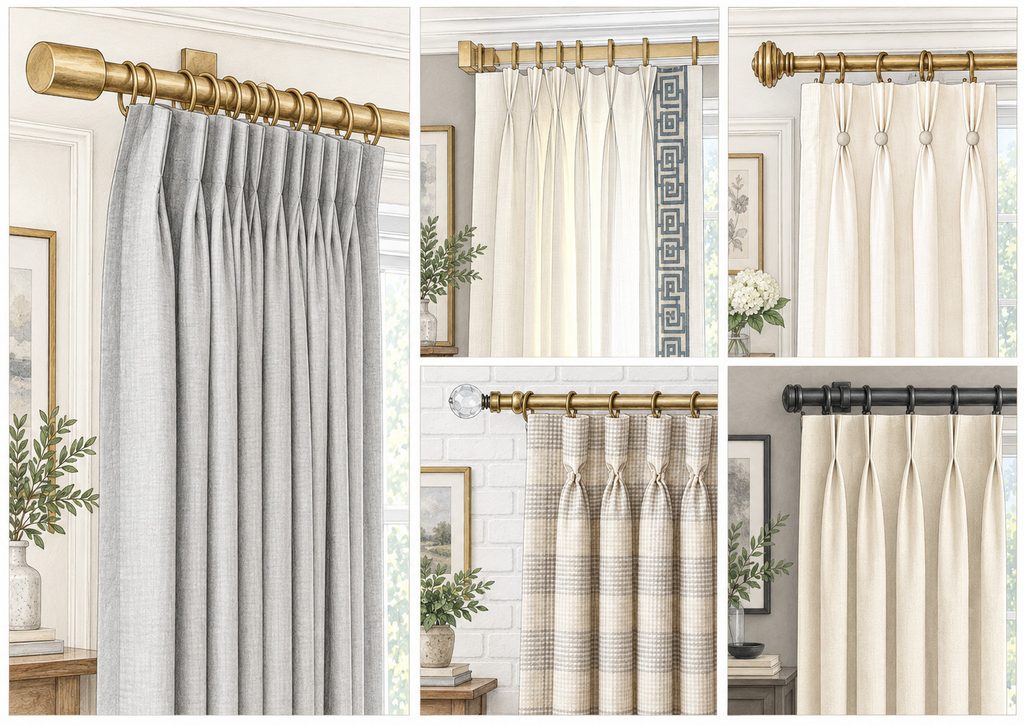
In some custom installations, the outside edge is independently supported with a drapery pin and an additional ring. This keeps the edge more controlled and allows the flat area beyond the last pleat to remain clearly presented.
In other examples, there is no separate attachment at the finished edge. The last pleat becomes the final main suspension point, while the remaining edge finishes naturally through the side hem.
Neither approach should automatically be considered the only correct one. Workroom standards, rod construction, fabric behavior, and the desired finished appearance can all influence the choice.
Where the Final Ring Is Placed
Even among side edges that are independently pinned, I noticed differences in where that last attachment is positioned.
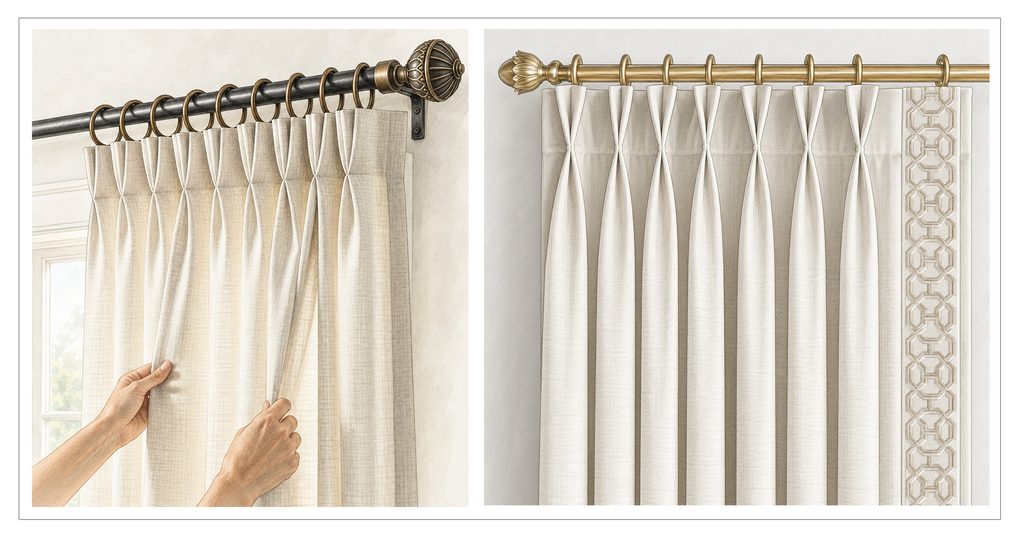
On some decorative rods, an extra ring is intentionally placed toward the end of the rod, sometimes beyond the main mounting bracket and closer to the finial. The side-edge pin is then attached to that ring, giving the outside edge a more defined position.
In other installations, the edge is simply attached to the outermost available ring without creating such a distinct end position.
It is a small hardware detail, but it changes how the side edge presents itself and how the panel relates visually to the bracket, finial, and end of the rod.
When the Side Edge Becomes a Return
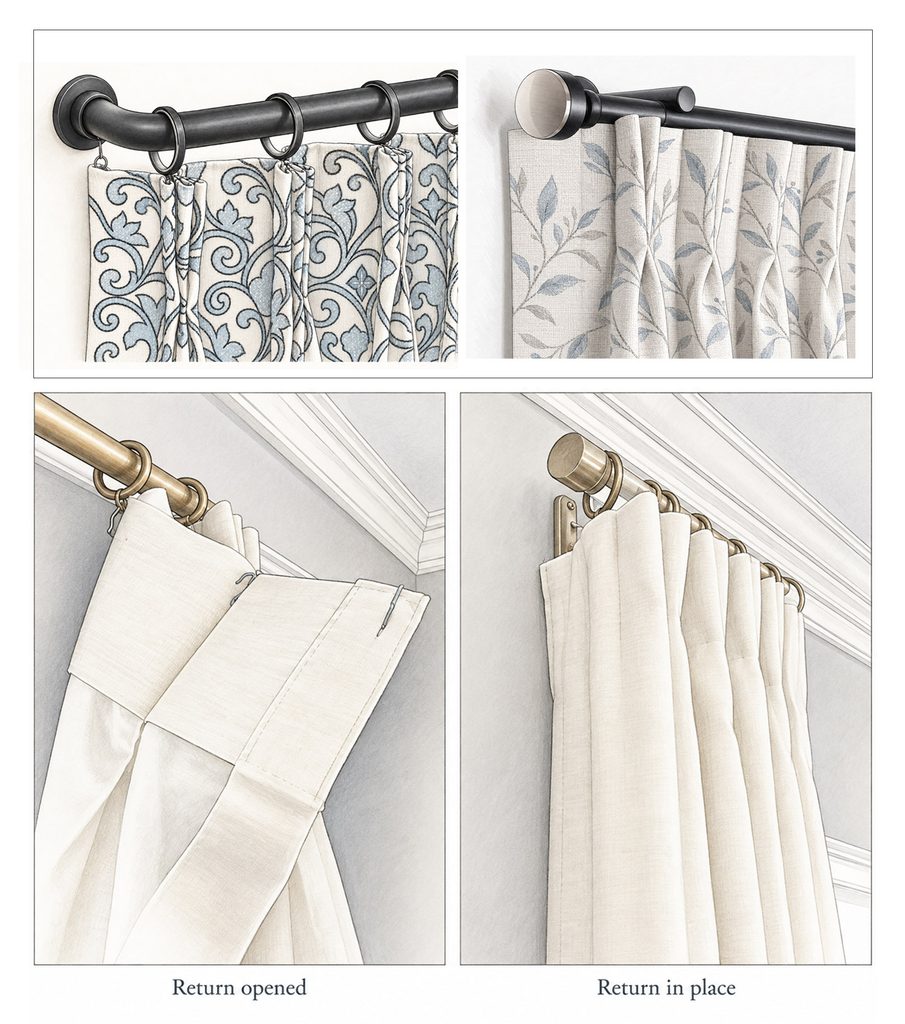
The side edge changes function when it continues back toward the wall instead of finishing on the front plane of the drapery.
This additional section is generally referred to as the return.
Returns can be created in several ways. A panel may be attached to a small wall hook or return fitting, continued around an additional hardware point, or carried around a rod that turns directly back to the wall, as with a French return rod.
The return changes the function of the side edge from a simple finish to part of the installation perimeter.It can help visually complete the treatment and reduce the open gap between the outside edge of the drapery and the wall.
A flat side edge and a returned side edge may begin at the same part of the panel, but their finished functions are quite different.
The Leading Edge
The leading edge is the inside edge of the panel—the edge that faces the opening and, on a pair of functional draperies, approaches the opposite panel when the treatment is closed.
Because it participates directly in the closure of the drapery, its construction often receives more attention than the outside edge.
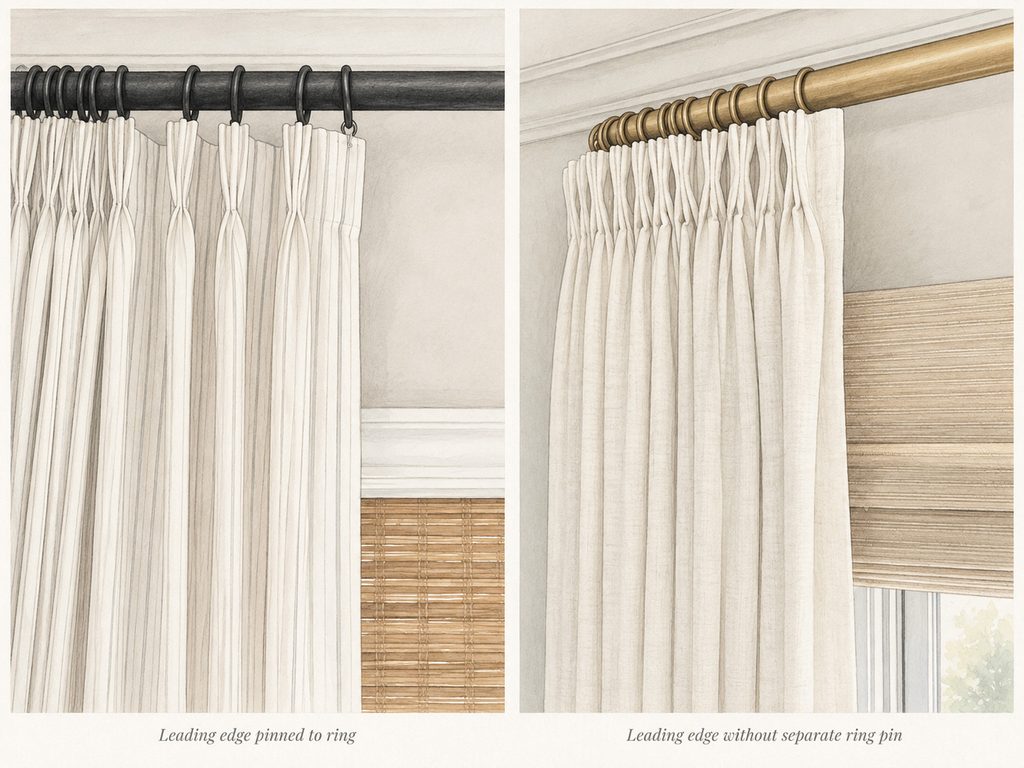
One difference that appears frequently in custom work is whether the leading edge receives its own independent attachment.
Some leading edges are finished with an additional drapery pin that connects directly to an inner ring, carrier, or other hardware point. This supports the flat section between the first pleat and the finished edge and gives the leading edge a more controlled position.
Other panels do not use a separate leading-edge pin. The last main attachment supports the heading, while the remaining edge hangs more freely.
Again, there is considerable variation between workrooms and hardware systems, so I would not treat either method as a universal standard.
The Leading Edge as a Decorative Detail
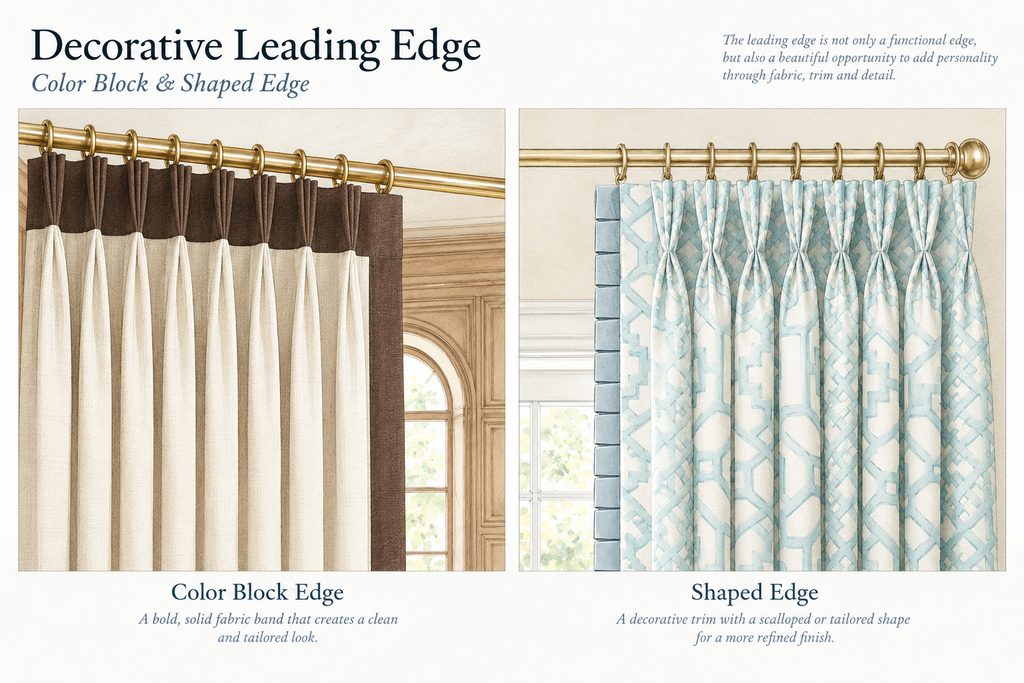
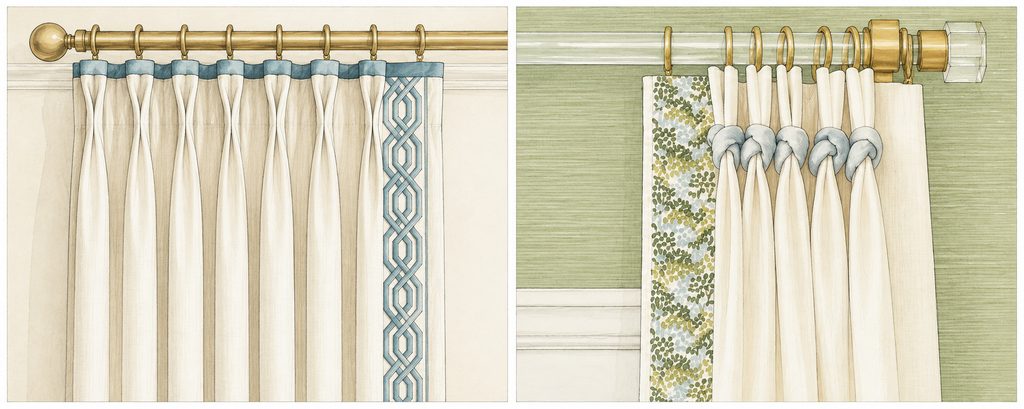
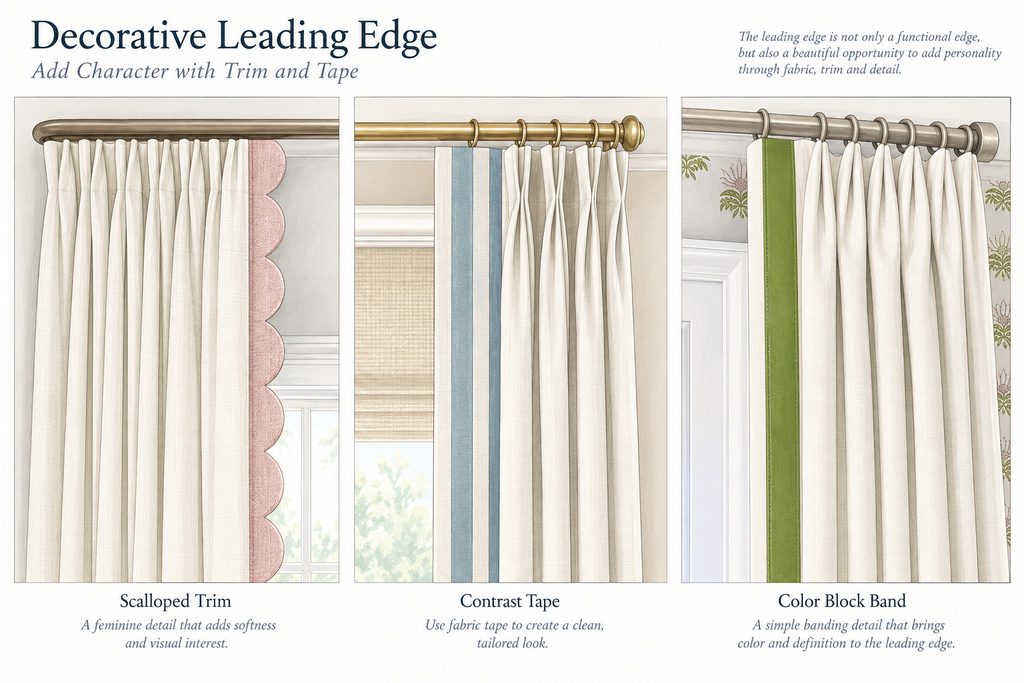
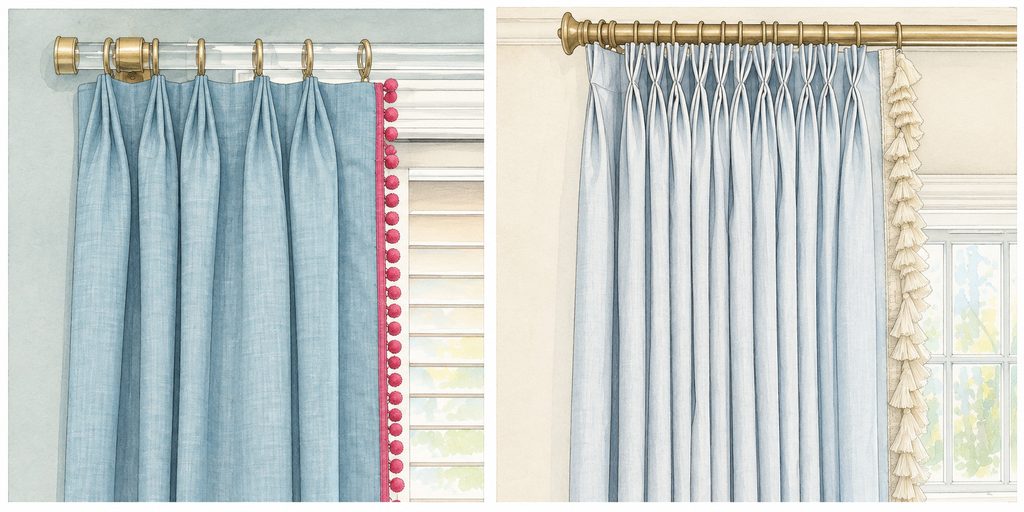
In many treatments, the leading edge also becomes one of the most visible places to introduce decoration.
On a pair of drapery panels, this vertical line sits close to the center of the window treatment. On stationary panels, it often frames the opening and remains fully visible. For that reason, even a relatively small detail can have a strong effect on the overall appearance.
Decorative tape can create a clean tailored line. Contrast fabric can frame the edge more strongly. A scalloped or shaped treatment changes the silhouette itself, while pom-pom, tassel, fringe, and other trims introduce texture and movement.
Some treatments remain very subtle; others deliberately turn the leading edge into a focal point.
The important point is not how decorative the edge is, but how the detail works with the scale of the panel, the heading style, and the fabric itself.
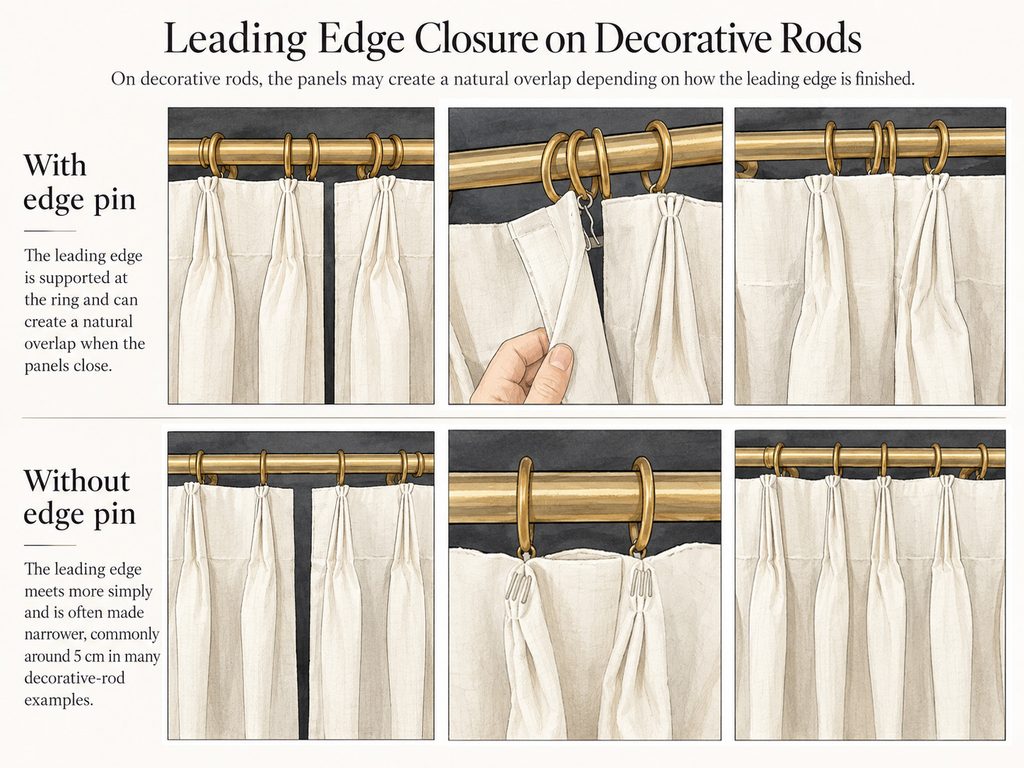
Leading-Edge Closure on Decorative Rods
While looking at decorative rods with rings, I found another interesting detail.
A decorative rod does not necessarily need a traverse-style overlap arm for the two leading edges to create some degree of overlap.
When the leading edges are independently pinned to the inner rings, and the edge sections are wide enough to meet with some extension, the two panels may naturally pass slightly in front of one another when closed.
This is different from a mechanically controlled overlap. The amount of overlap may be small, and it can vary depending on ring placement, leading-edge construction, fullness, and the behavior of the fabric.
When there is no separate leading-edge attachment, the two edges may instead meet more directly, with less pronounced front-to-back layering.
For that reason, I think it is more useful to view this as a natural closure condition rather than as a fixed overlap specification.
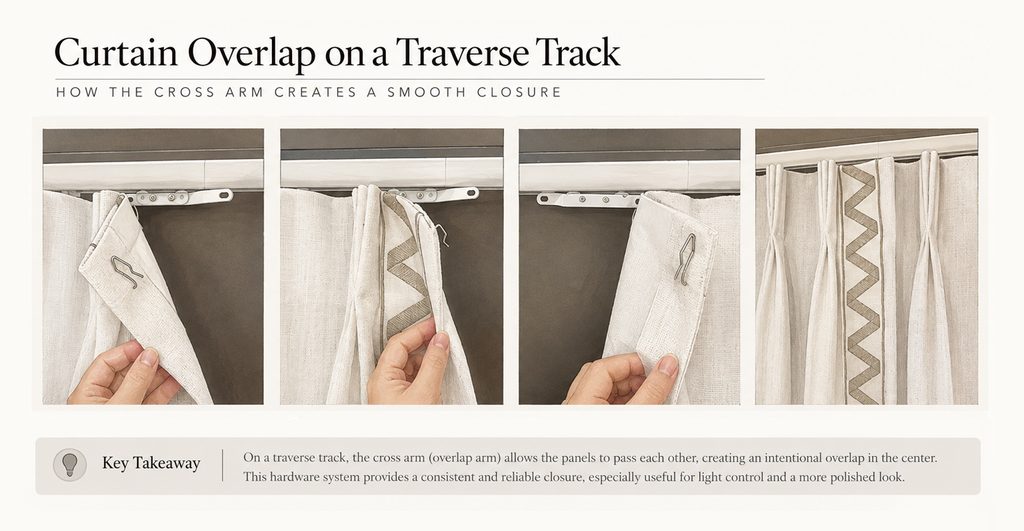
Overlap on a Traverse Track
Traverse tracks and traverse rods approach overlap differently.
Here, the overlap is created intentionally through the hardware. An overlap master, cross arm, or similar carrier allows one leading edge to travel in front of or behind the other as the draperies close.
This creates a more controlled center closure and helps reduce the visible gap between the two panels. It can also improve privacy and light control.
The distinction is useful: two drapery panels can appear to overlap visually on a decorative rod, but a traverse system creates that relationship through a dedicated hardware mechanism.
In other words, overlap should not be judged from the appearance of the leading edge alone. The final closure depends on both the edge construction and the hardware system.
Final Thoughts
Side edges and leading edges are small details, but they reveal a great deal about how a drapery treatment has been designed and fabricated.
The more examples I looked at, the clearer it became that these details are not handled in one universal way. Workrooms may use different edge widths, different pin locations, different return methods, and different approaches to center closure.
For me, that variation is exactly what makes the subject worth documenting. Rather than trying to reduce every treatment to one rule, it is more useful to understand the purpose behind each construction choice and how it changes the finished appearance.
That understanding makes it easier to read a drapery specification, evaluate a hardware system, or communicate more clearly with a workroom.
Related Reading
You can connect this article with several earlier WTJ references:
Understanding Drapery Anatomy — for the main parts and terminology of a drapery panel.
Understanding Drapery Heading Styles — for how heading construction affects the top of the panel.
How to Measure for Drapery — for the relationship between finished dimensions and installation conditions.
Understanding Drapery Stack Back — for how heading, fabric, and hardware influence the space a drapery occupies when open.
Comments are closed.